Upload & Download From Remote FTP & SFTP Servers
Arc simplifies the process of uploading and downloading files from a remote FTP or SFTP server. This article serves as a guide for getting an automated FTP and SFTP Flow up and running in minutes.
- Create FTP & SFTP Connectors
- Configure the Connectors
- Using FTP/SFTP as Part of a Larger Solution
- Next Steps
Create FTP & SFTP Connectors
Arc has dedicated FTP and SFTP Connectors, both of which are available in the 'Core' toolkit of the Flows page. Dragging one of these connectors into the Flows canvas creates an instance of the connector, which we can use to create an automated file upload and/or download Flow.
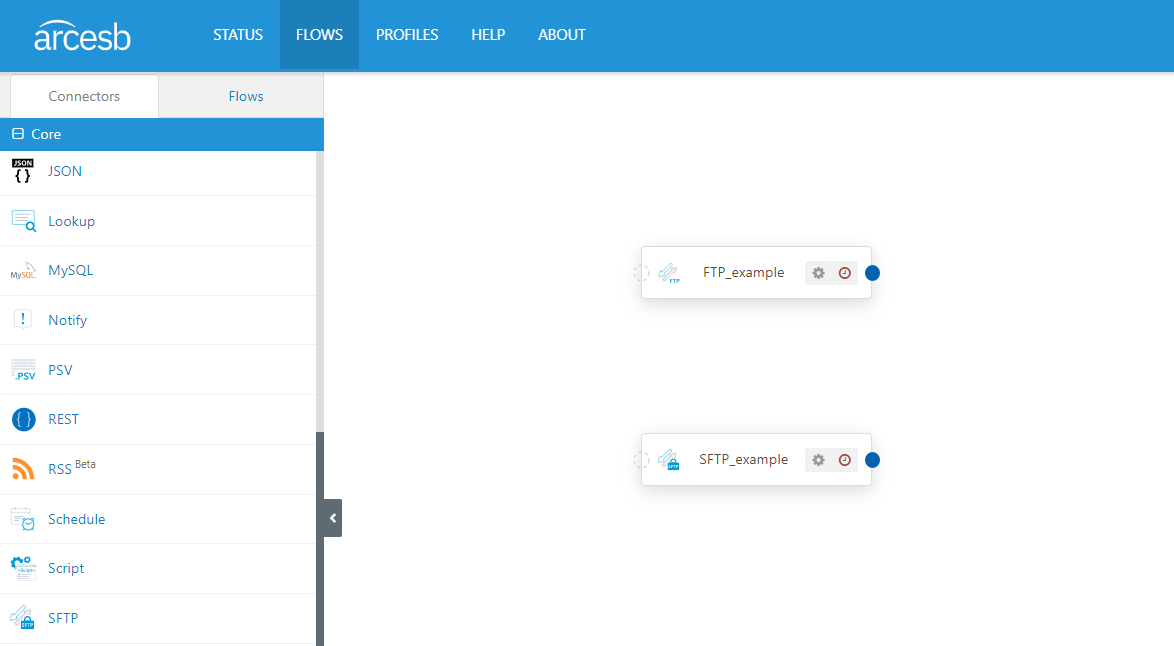
These connectors serve as our point of contact with the remote FTP or SFTP server. We can both upload to and download from the server(s) using these connectors, and we'll need to give these connectors access to the server.
Configure the Connectors
The first step in configuring our new connectors is to provide the connection details for the remote FTP or SFTP server.
Establish a Connection
Typically, the connection details include the following:
- The IP address or hostname of the server
- The port on which to connect (you can typically leave the default value in the connector)
- Login credentials, like a username & password
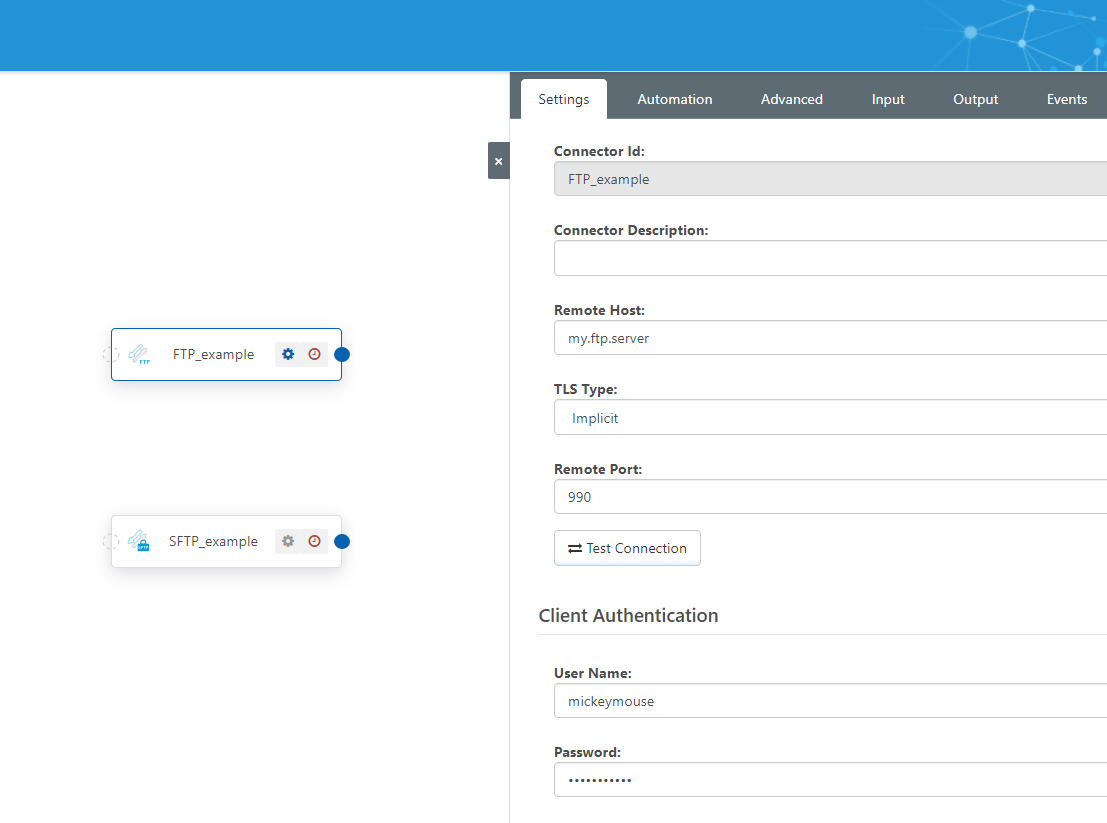
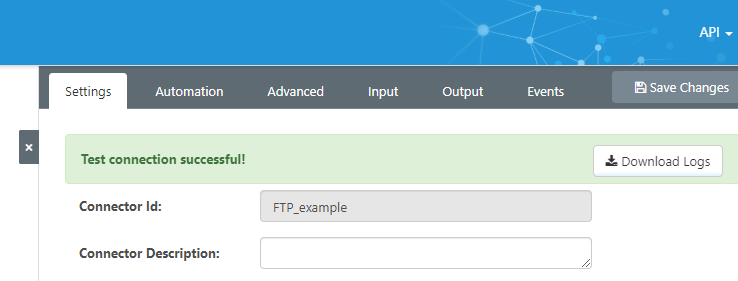
Once you've configured the connection, you can use the Test Connection to confirm that the connector can successfully reach the server. A successful connection attempt will result in a banner like the following:
Configure Remote Folders
Each FTP or SFTP Connector targets a specific folder on the remote server to upload files to and/or download files from.
Configuring the remote folders is done in the Upload and Download sections of the Settings tab. The Remote Path field in these sections should be set to the folder path (on the server) where files should be uploaded to (if applicable) and downloaded from (if applicable).
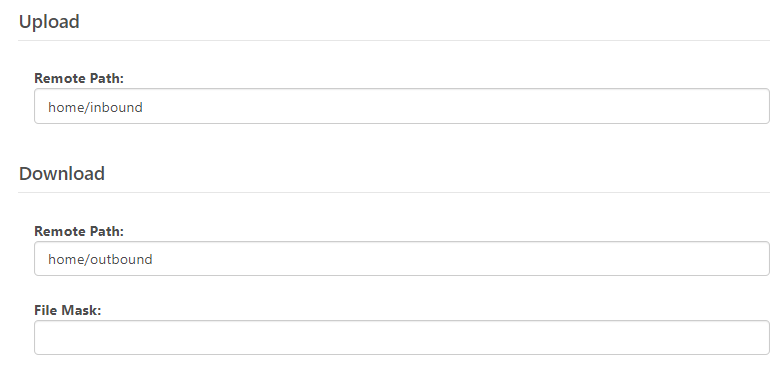
These connectors support additional download options, such as filtering downloaded files and caching file details to ensure files are not downloaded more than once.
Configure Automation
Now you have the ability to communicate with a remote FTP or SFTP server, and you have told the connector where files should be uploaded or downloaded. Next, configure the Automation settings to precisely control your data flows.
In the Automation tab, there are checkboxes for separately enabling Upload and Download automation. This is you can tell the connector whether its job is to pull files down, push files out, or both.
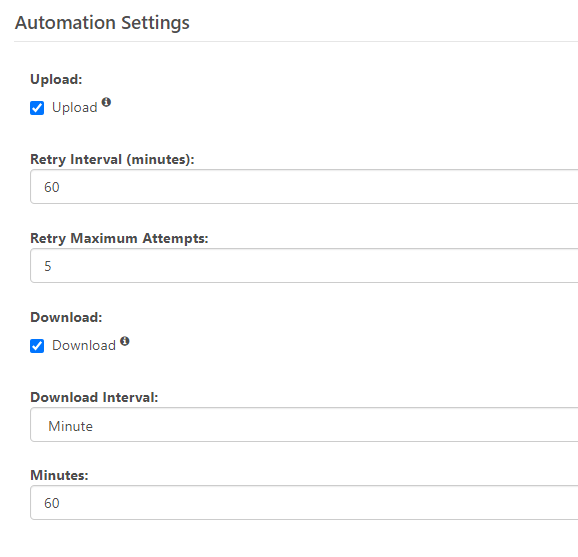
When Upload automation is enabled, the connector uploads files to the remote FTP or SFTP server, including files placed in its Input/Send folder, as well as files routed to the connector via the blue flow arrows in Arc's Flows canvas.
When Download automation is enabled, the connector will poll the remote server at a regular interval to find files to download. Files that are found and downloaded will be placed in the Output/Receive folder for the connector. If the connector is connected to others via blue flow arrows, then these files will not remain in this Output/Receive folder but will instead be passed along to the next connector in the Flow.
If you're ever not sure where the Input/Send or Output/Receive folders are on the file system, you can check the Input and Output tabs of the connector, which have these file paths at the top of the tab panel.
Using FTP and SFTP as Part of a Larger Flow
Just from the steps so far, you have an automated solution for uploading and/or downloading files from an FTP or SFTP server. But often, this is only one part of a larger solution that involves more complex file processing.
Arc's flexible workflow canvas makes it easy to process files according to your specific needs. The trick is simply to create instances of new connectors that perform the additional processing you want; then, when these connectors are connected via blue flow arrows, data will flow automatically from the FTP or SFTP endpoint through the rest of your workflow.
Let's say you want to download files from an FTP server and then push them up into a cloud storage platform, like Google Drive, for safe-keeping. All we need to do is add a Google Drive Connector to our existing flow, then connect the connectors like this:
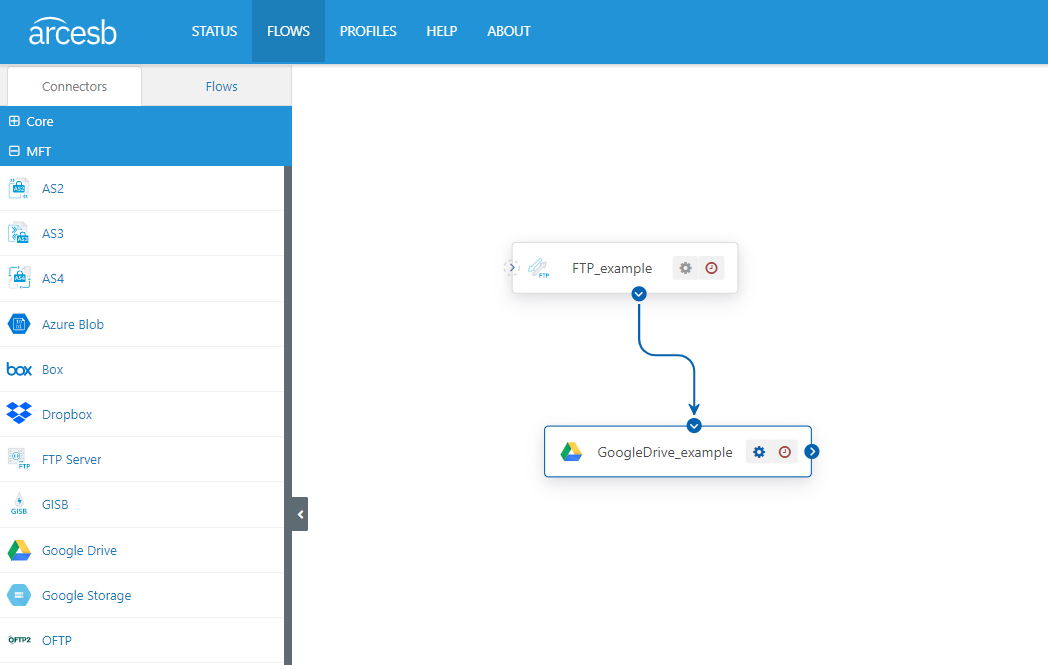
Just like the FTP or SFTP Connectors, you would need to configure the connection details and credentials for Google Drive, and then the folder(s) where you want files to end up. But after these simple configuration steps are down, you would have an automated flow of data between the remote FTP server and our Google Drive account.
Next Steps
If you haven't already, you can get started with Arc for free by downloading the application here. Arc comes with a free, fully-functional 30-day trial license, so you can confirm for yourself that the FTP and SFTP automation is as simple as described in this article.
Here in the knowledge base, you can also find articles on Getting ArcESB Up and Running, AS2 Video Guides, and more.
For assistance setting up your own automated FTP or SFTP workflow in Arc, just reach out to our technical team anytime at support@arcesb.com.
Ready to get started?
Learn more about ArcESB or download the free single-connector license:
